Today, people want unique and eye-catching designs. From custom gifts to fancy signs, printing and cutting tools are in high demand. Two powerful machines—UV printers and laser cutters—are now changing the way we create things.
A UV printer can print bright and colorful images on many materials. It works fast and the ink dries right away using special lights. A laser cutter, on the other hand, uses a strong beam of light to cut or engrave shapes with great detail.
When you use both machines together, the results are amazing. You can print colorful images and cut perfect shapes in one smooth process. This makes your work look sharp, clean, and professional.
This guide will help you learn how these two machines work. It will also show why using them together can help you make better products, faster and easier. Whether you’re making signs, crafts, or business items, this combo can open many new doors.
Understanding UV Printers
A UV printer is a special kind of printer. It uses bright lights to dry the ink right after printing. This drying happens fast. That’s why the colors look fresh and don’t smudge. You can use a UV printer on many things. It works on wood, plastic, glass, metal, and even leather. That makes it great for printing signs, phone cases, awards, and more. The printer sprays ink on the surface. Then, ultraviolet light shines on it. The ink dries in a second. This helps the image stick better and last longer. UV printers also print in very fine detail. Even tiny letters and lines look clear. You can also print white ink or shiny layers for special effects. This machine is flat, like a table. So, you can place thick or odd-shaped items under it. That makes it easy to print on almost anything. People like UV printers because they save time. They also waste less ink and don’t need much cleanup. If you want strong prints that pop with color, a UV printer is a great tool.
Understanding Laser Cutters
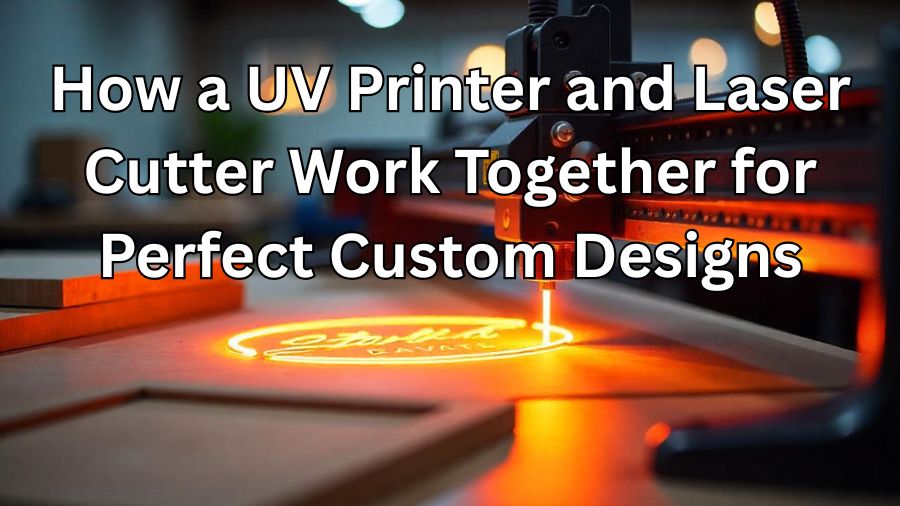
A laser cutter is a smart machine that uses a tiny beam of light. This light is super hot. It can cut through many materials like wood, plastic, leather, and even metal. The laser moves across the surface. It follows a design made on the computer. The beam melts or burns the material to create shapes or words. The edges come out smooth and neat. There are different types of laser cutters. Some are strong enough to cut thick items. Others are made for softer materials. Some lasers can even engrave pictures without cutting all the way through. Laser cutters are great for making signs, name tags, puzzles, and gift boxes. They can cut tiny details that are hard to do by hand. Many crafters and small business owners use them to make custom items. This tool needs careful setup. You have to adjust the speed and power for each material. But once you learn, it becomes easy to use. Laser cutters help you create fast, clean, and perfect designs. They are a great match for UV printers when making colorful and detailed projects.
Why Use Both Together?
Using a UV printer and a laser cutter together is like having a super team. Each machine does something special. But when you mix their powers, the results are even better. The laser cutter gives you perfect shapes. It slices clean lines and sharp corners. Then the UV printer adds bright colors and fine details. This combo makes your work look more polished and eye-catching. Let’s say you cut a wooden keychain with the laser. You can then print a colorful design on top with the UV printer. The product looks smooth, strong, and full of life. This method also saves time. You can cut, print, and finish a project faster. There’s no need for glue or extra tools. It all comes out of two machines that work side by side. When you use both tools together, you can make gifts, signs, and products that stand out. They feel more personal and look more professional. This mix is great for small shops and home businesses. It helps turn simple ideas into real things people want to buy.
Ideal Workflow (Best Practices)
To get the best results, you need to follow the right steps. The order you use the machines matters a lot. A small mistake can ruin the whole project. Many people like to cut first. They use the laser cutter to shape the item. It could be wood, acrylic, or another flat surface. Once the shape is ready, they move to the UV printer. Before printing, they mark the edges or corners. These marks help line up the print with the cut shape. It’s like placing a sticker in the right spot. This keeps the print from going off the edge. Some people print first, then cut. That also works if the laser has a camera or sensor. The machine can find the printed image and cut around it. This needs more setup, but it can save time later. It’s also smart to test your design on scrap material. This helps check if everything fits well. You can catch small problems before using your good materials. Using the right software helps too. Programs like LightBurn can control both cutting and marking. They also help with alignment and speed settings. In short, a good plan makes your project smoother. It keeps your prints sharp and your cuts clean. With practice, this process becomes quick and easy.
Equipment Highlight
To start your own projects, you need the right tools. Let’s look at the kinds of UV printers and laser cutters that work well together. A UV printer usually comes in a flatbed style. This means it has a flat surface where you place your items. Some are small enough for a desk. Others are big enough for signs or boards. One popular size is the A3 model. It’s perfect for printing on phone cases, keychains, and small gifts. Look for a printer that can print white ink. This is helpful when working on dark or clear materials. Also, check if it can print in layers. This gives a cool 3D effect on your design. Now let’s talk about laser cutters. There are desktop models for home use. These are great for wood, leather, and acrylic. Some common brands are Trotec, Glowforge, and xTool. These machines are easy to set up and come with clear software. If you need more power, there are bigger cutters too. These can cut thicker materials and work faster. Some also have a camera to help you line things up. That’s handy when printing and cutting in one project. Both tools come in many price ranges. You don’t have to buy the biggest or most expensive one. Start with what fits your space and needs. As you grow, you can always upgrade. The right equipment makes your work easier. It also helps you create better-looking products that people will love.
Applications & Use Cases
When you use a UV printer and laser cutter together, the possibilities are endless. You can make all kinds of creative and useful items. One great use is custom signs. Cut out a neat shape with the laser. Then print a bright logo or message on top with the UV printer. The colors pop and the edges stay clean. You can also make gifts. Think of wooden keychains with colorful names. Or glass awards with printed logos and engraved designs. These items look fancy but are easy to make. Phone cases are another fun idea. Cut out the case shape, then add bold prints with cool textures. The final product feels smooth and looks eye-catching. This combo is also perfect for packaging. You can cut custom boxes or labels. Then print sharp images and details to match your brand. Even small businesses use these tools to make tags, badges, and nameplates. Each piece is unique, strong, and ready to sell. Crafters love this setup too. They make puzzles, wall art, bookmarks, and more. The mix of sharp cuts and colorful prints brings every design to life. No matter what you create, this pair of tools helps you stand out. It adds value to simple items and turns ideas into real products.
Challenges & Solutions
Using a UV printer and laser cutter together is exciting. But like any tool, there are a few bumps along the way. The good news? Most problems have simple fixes. One common problem is alignment. If your print and cut don’t match, the design looks off. To fix this, use guide marks. Some people draw small boxes or dots to help line things up. Others use cameras or sensors for better results. Another issue is edge burn. The laser may leave dark marks on the edges of wood or plastic. You can reduce this by lowering the laser power or masking the surface before cutting. Ink peeling is also a problem, especially on smooth or oily materials. Before printing, wipe the surface clean. Some people use a light sanding or primer spray to help the ink stick better. Dust is another troublemaker. Laser cutting can leave behind tiny bits. Always clean the surface before printing. A quick wipe or air blower works well. Software can be tricky at first. But with practice, you’ll learn to set the right speed and power. Always test on a scrap piece before using good materials. Machines also need care. Clean the UV print head and laser lens often. This keeps your prints sharp and your cuts clean. Mistakes happen, and that’s okay. Each project teaches you something new. With a little patience, you’ll get better and faster every time.
Conclusion
Using a UV printer and laser cutter together opens many creative doors. You can make bright, colorful designs with sharp, clean cuts. This mix gives your work a professional look. These tools save time and effort. They let you create gifts, signs, and products that stand out. Whether for fun or business, they help you bring ideas to life. Start small and practice your workflow. Learn how to align prints and cuts perfectly. Fix problems as you go. With patience, you’ll get better and faster. Soon, you can make unique items that people love. If you want to create eye-catching and precise products, this powerful pair is the way to go. Try using a UV printer and laser cutter in your next project. You’ll be amazed at what you can make.